To send personalized SMS messages using the Custom SMS feature, follow these steps:
Navigate to Custom SMS.
Click the Download button to download the Excel file template.
Click the Import button to upload an Excel file. The Excel file should have the following structure:
First Column: This MUST contain the phone numbers of the recipients.
Next Six Columns: These can contain any custom data you wish to use in your SMS, such as names, products, amounts, dates, etc.
o Note: The system reads data from only the first six columns of the uploaded Excel file.
After uploading the Excel file, a user will be able to type their SMS message with the dynamic content.
Use placeholders to represent data from the uploaded Excel. The placeholders are labelled as `Value1`, `Value2`, `Value3`, `Value4`, `Value5’ `Value6`, and `Value7`, which correspond to the first seven columns in the Excel file.
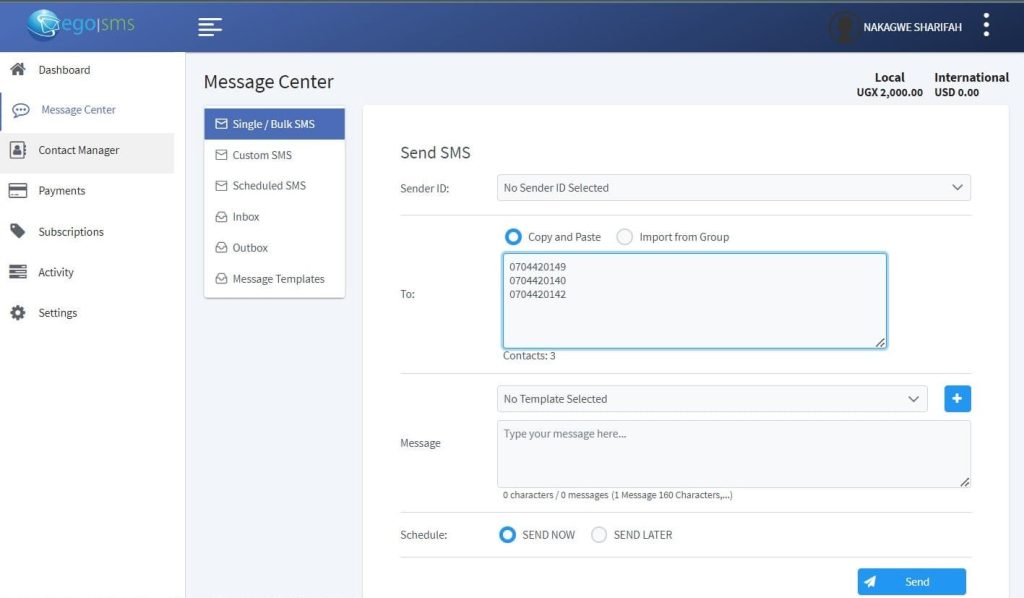
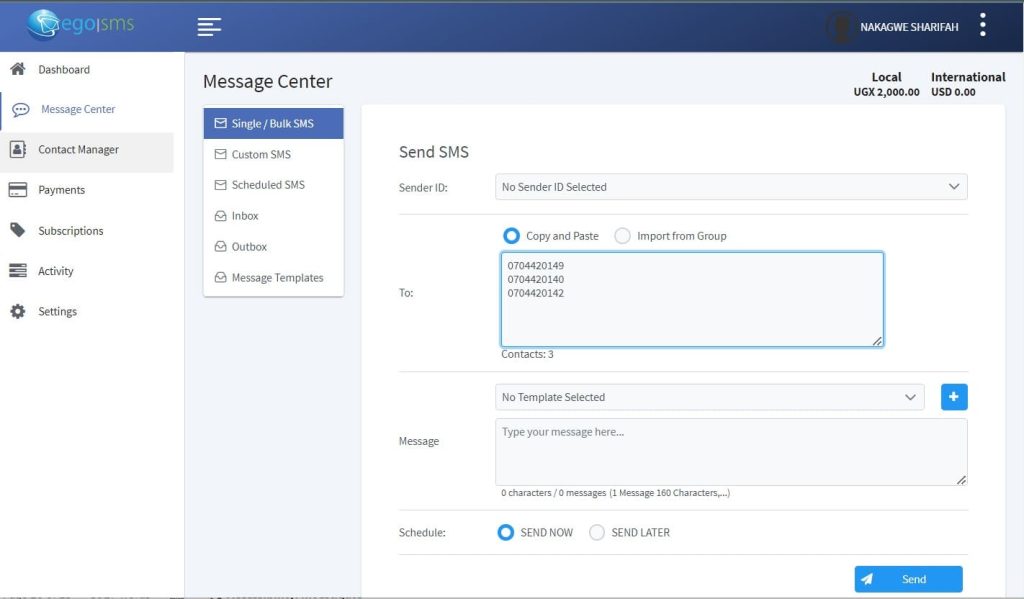
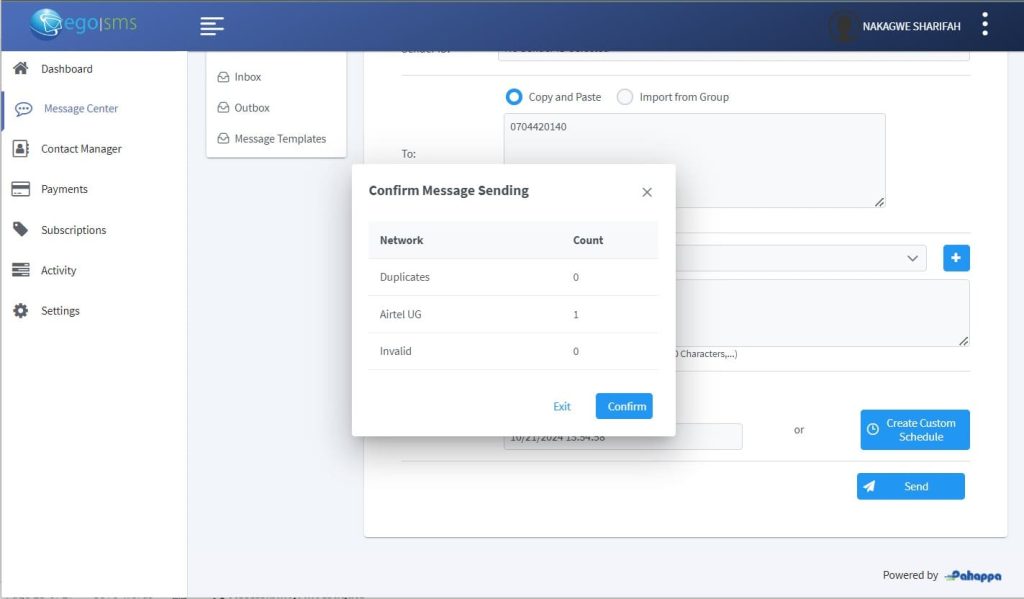
Once your message is ready, choose one of the following options:
Send Now: Immediately send the message to all recipients.
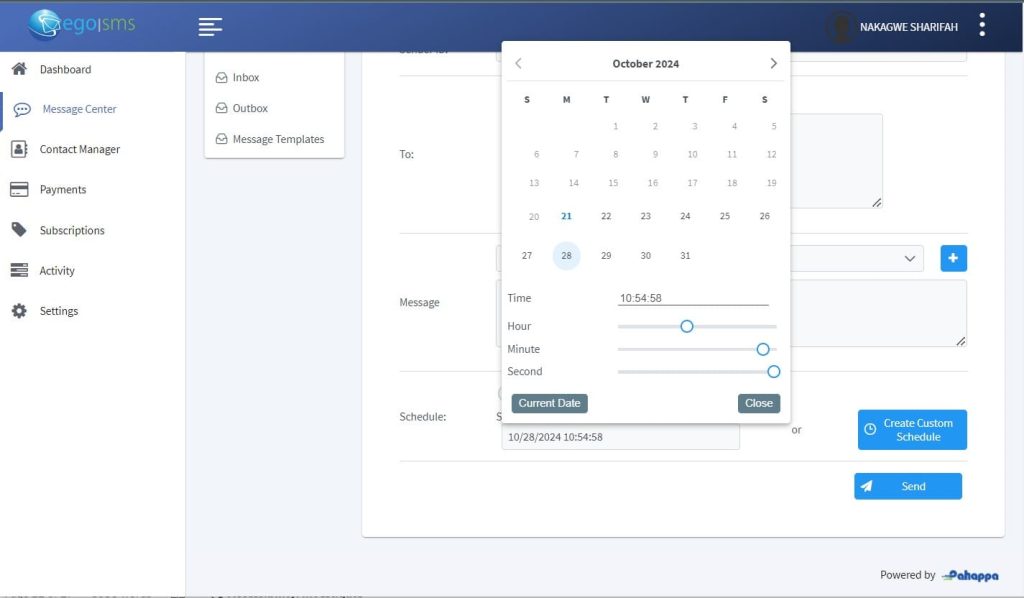
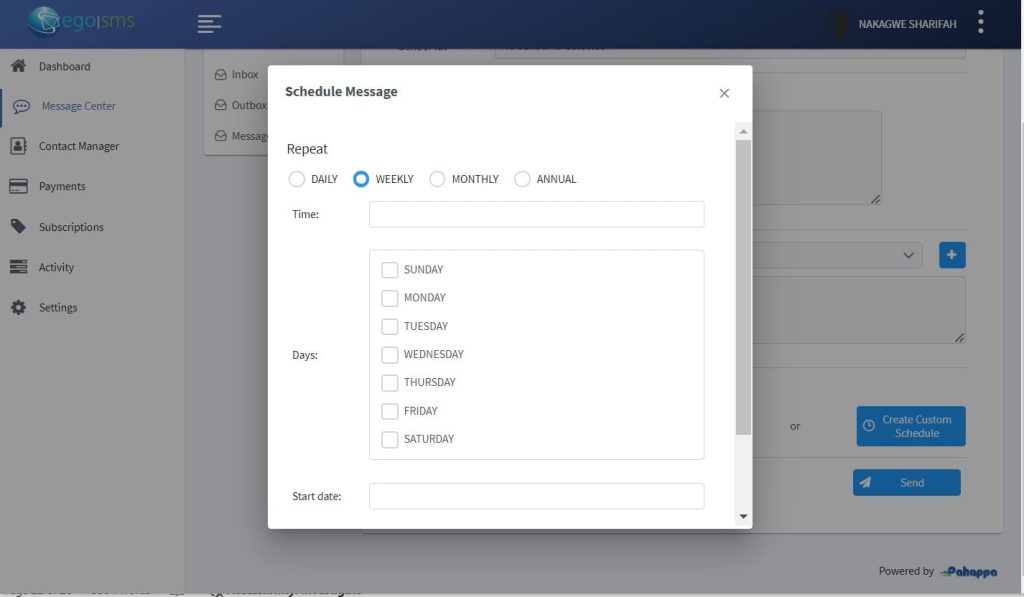
Send Later: Schedule the message for a later date and time.
After selecting your option, confirm the message, and the placeholders will automatically be replaced with the actual data from your Excel file.
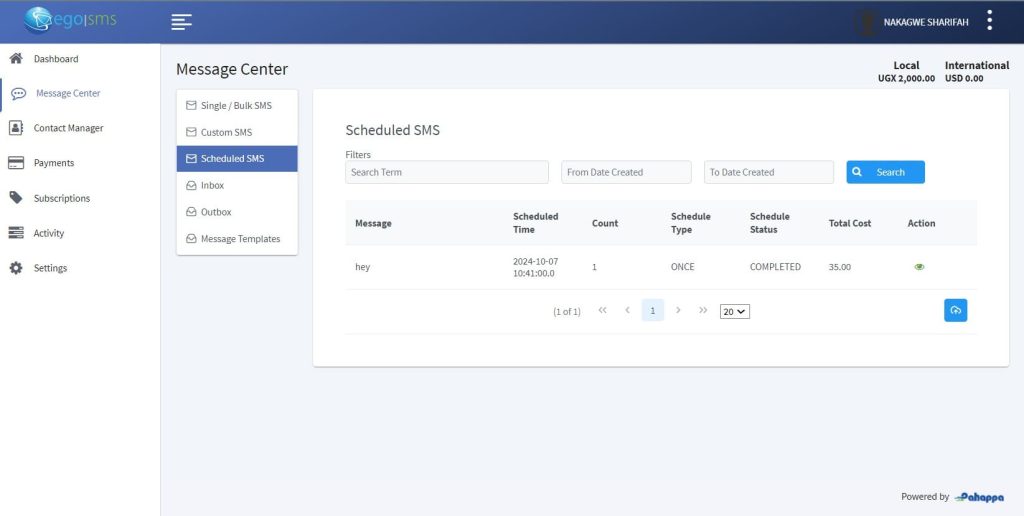
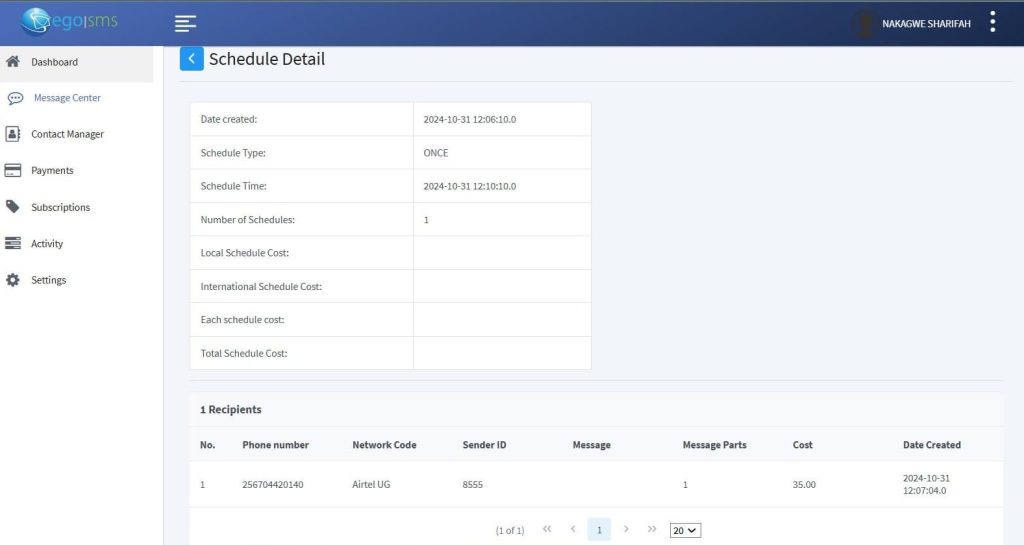
In this section, you can view all messages that have been scheduled for later delivery. The following details are available for each scheduled message:
Message: The content of the message you have scheduled. o Scheduled Time: The specific date and time the message is set to be sent. o Count: The total number of recipients for the scheduled message.
Schedule Type: Indicates whether the message is a onetime send or part of a recurring schedule.
Schedule Status: Current status of the scheduled message (e.g., Scheduled, Completed,). o Total Cost: The total cost associated with sending the scheduled message.
To view detailed information about a specific scheduled message, click the View button. This will display all relevant details about the scheduled message, including recipient lists.
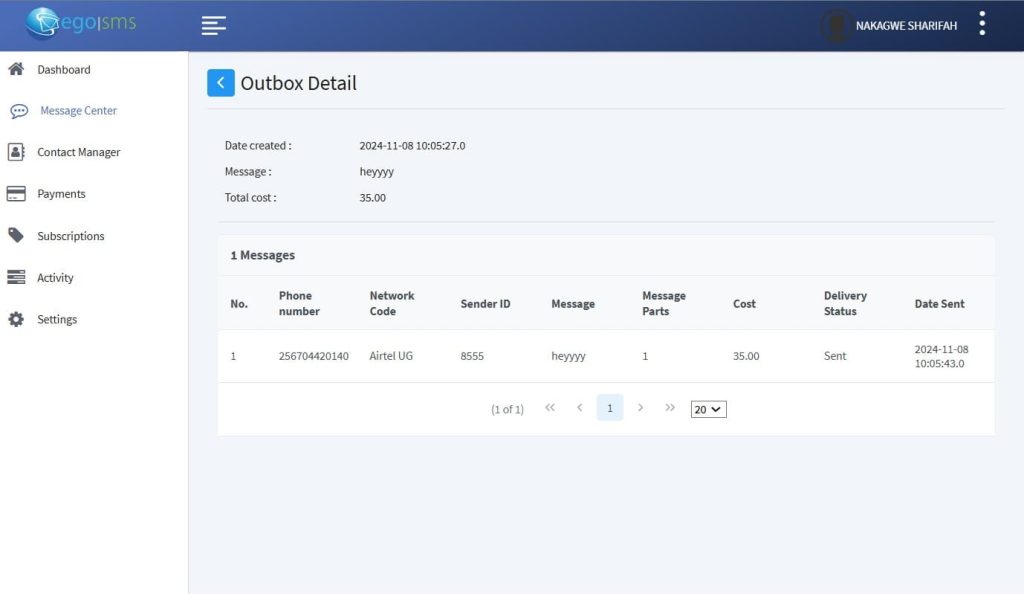
In the Outbox, users can view all messages that have been sent out. The following details are available for each sent message:
Message: The content of the sent message.
Count: The total number of recipients who received the message.
Total Cost: The total cost incurred for sending the message.
Date: The date and time the message was sent.
To view detailed information about a specific sent message, click the View button. This will display all relevant details regarding the sent message, including recipient lists.